 Apple Wallet and
  Google Wallet
This article provides instructions on integrating our tickets with Google and Apple Wallet for native ticket accessibility.
Prerequisites
Before proceeding with the integration, ensure that you have:
- Access to our ticketing API documentation and a valid developer account for our ticketing API.
- Basic understanding of API usage and authentication for ordering and activating coupons and tickets.
- This Feature is available from API V6.
Apple Wallet
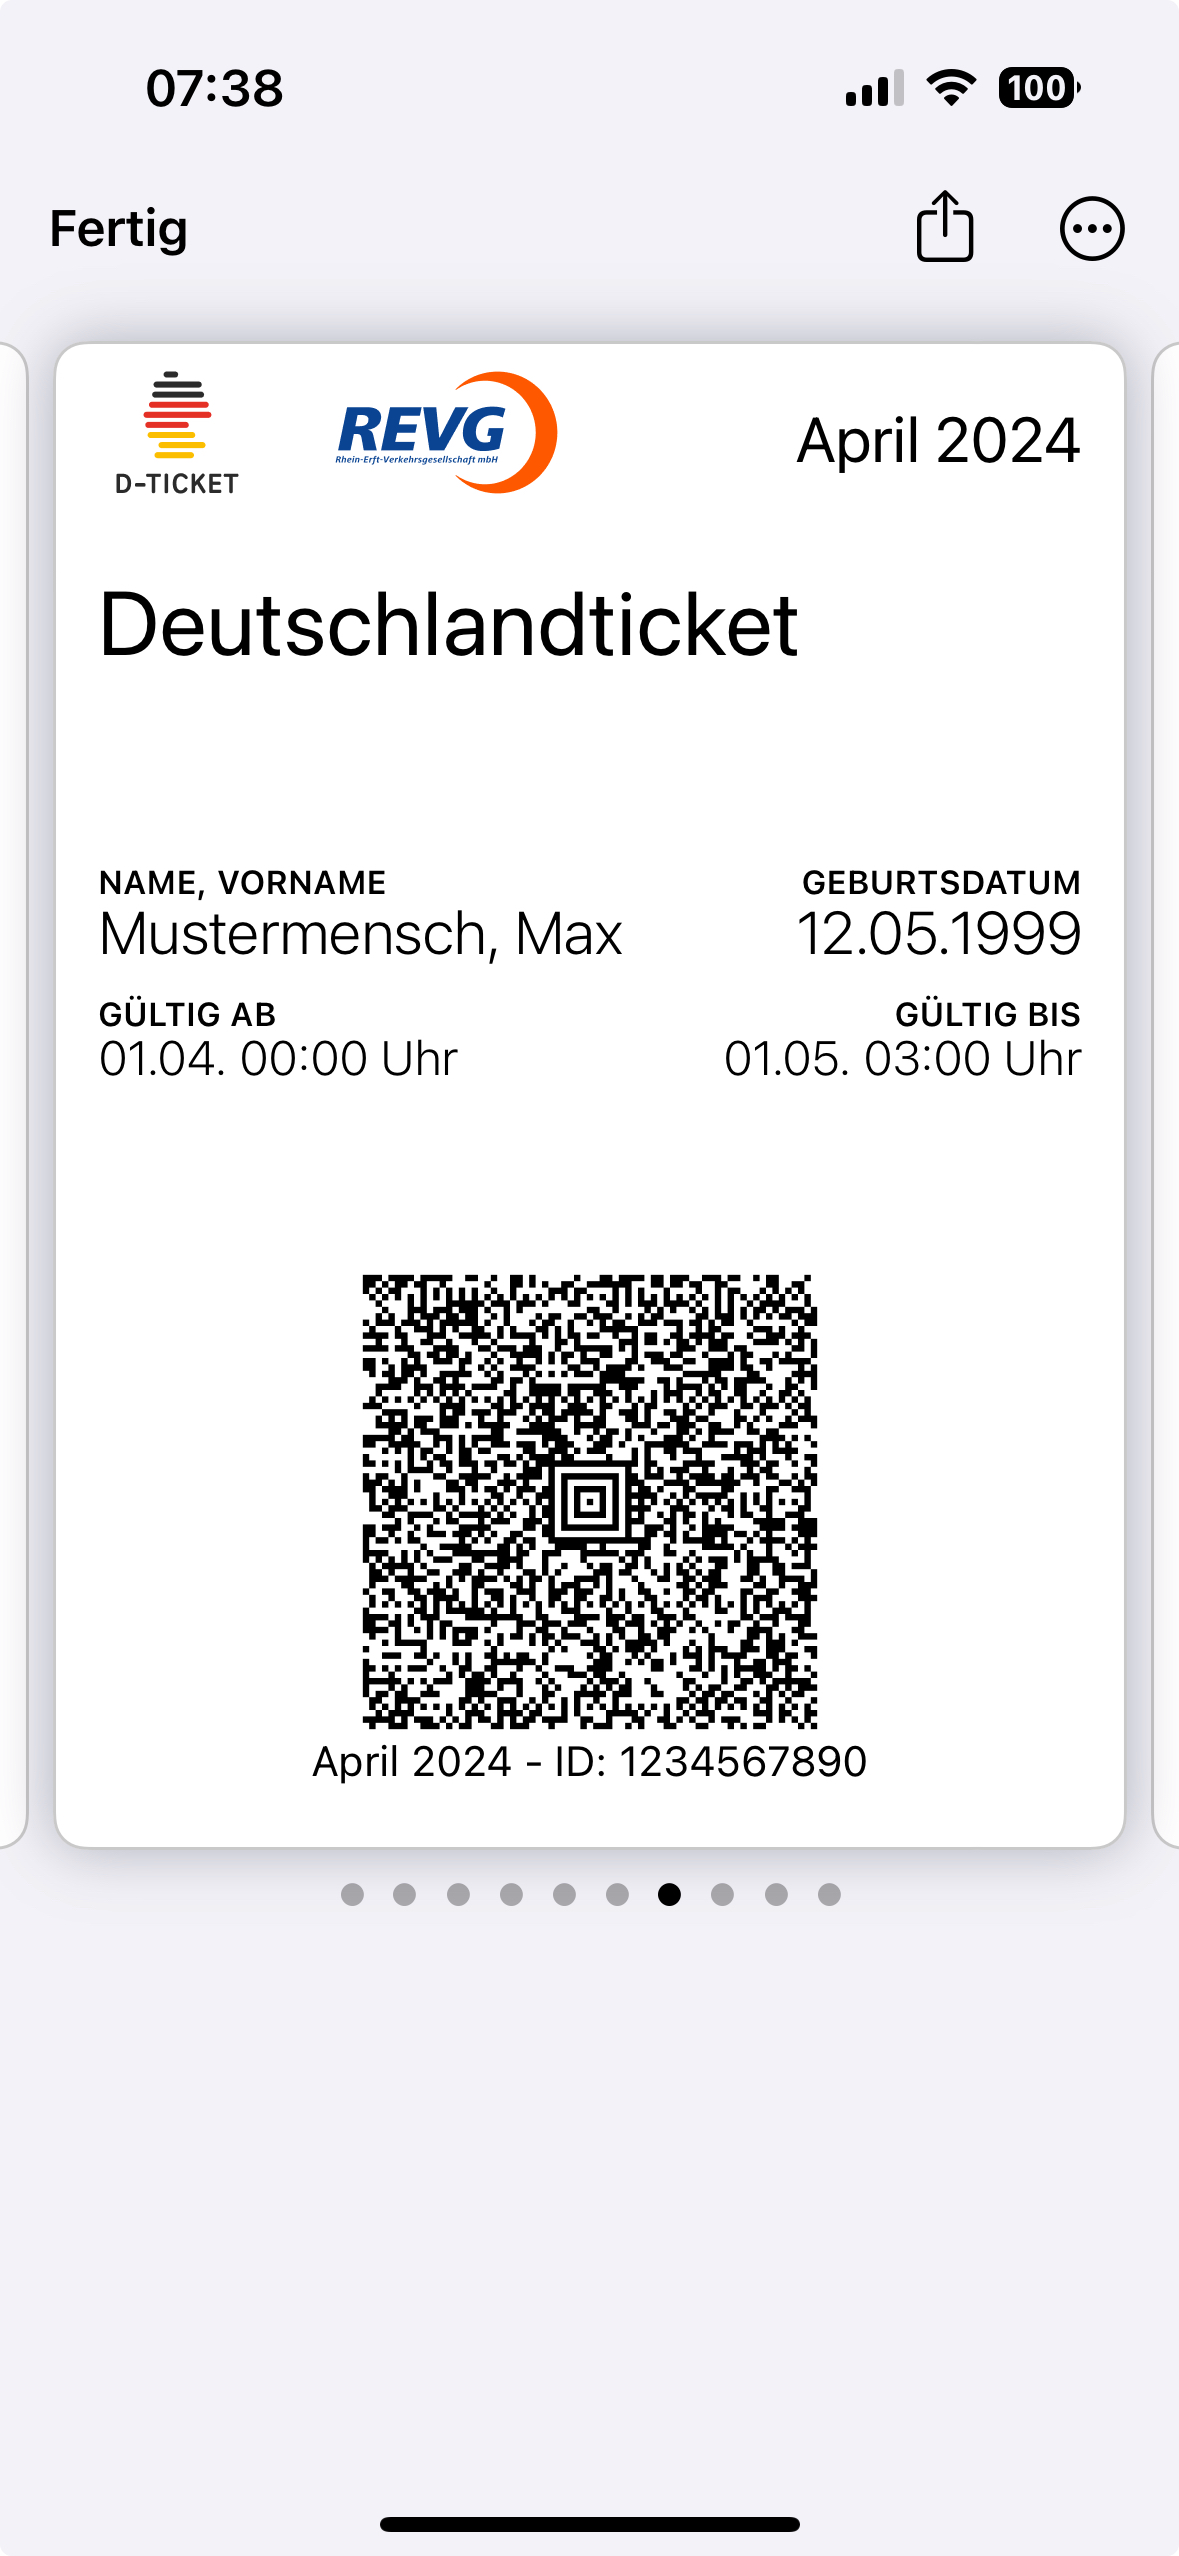
Our ticketing system offers seamless integration with Apple Wallet, allowing users to store their tickets directly on their iOS devices. This documentation outlines the process of creating an Apple Wallet pass using our API.
Steps to Create and Integrate an Apple Wallet Pass with our API:
NOTE: The next chapters will explain the usage of the ticketing and Apple Wallet pass endpoints in an abstract way. Please check out the Ticketing API documentation for a detailed api description.
Step 1: Order a Product
Start by placing an order for your desired product via our ticketing API (ensure you're using API V6 or higher). Once the order is complete, you'll receive a coupon.
POST /v6/ticketing/orders.json
  -H 'Authorization: Bearer {your_api_key_here}'
  -H 'Content-Type: application/json; charset=utf-8'
{
  "product_ids": ["mobilitybox-product-uuid"]
}
Step 2: Activate Coupon and Obtain Ticket ID
Activate the coupon you received to obtain the corresponding ticket ID. The ticket ID will be required to generate the Apple Wallet pass.
POST /v6/ticketing/coupons/{coupon_id}/activate.json
  -H 'Content-Type: application/json; charset=utf-8'
{
  "identification_medium": {
    "photo_id_lite": {
      "first_name": "Max",
      "last_name": "Mustermensch",
      "birth_date": "1999-05-12"
    }
  }
}
Step 3: Create and receive PKPASS File
To create a PKPASS file you can use the following API:
GET /v6/ticketing/passes/apple_wallet/{ticket_id}.pkpass
Upon successful invocation of the API endpoint, you will receive a PKPASS file. This file encapsulates all the relevant ticket information and can be added to Apple Wallet.
Step 4: Distribution Options
You have the flexibility to distribute the generated PKPASS file through various channels:
- Email: Attach the PKPASS file to an email and send it directly to the user.
- In-App: Provide a "Add to Apple Wallet" button within your app, linking directly to the PKPASS file for seamless integration.
NOTE: It is not allowed to add a "Add to Apple Wallet" Button into Android Apps
NOTE: Please check out the Add to Apple Wallet Guidelines to fullfill their requirements of integration this feature.
Mobility Wallet
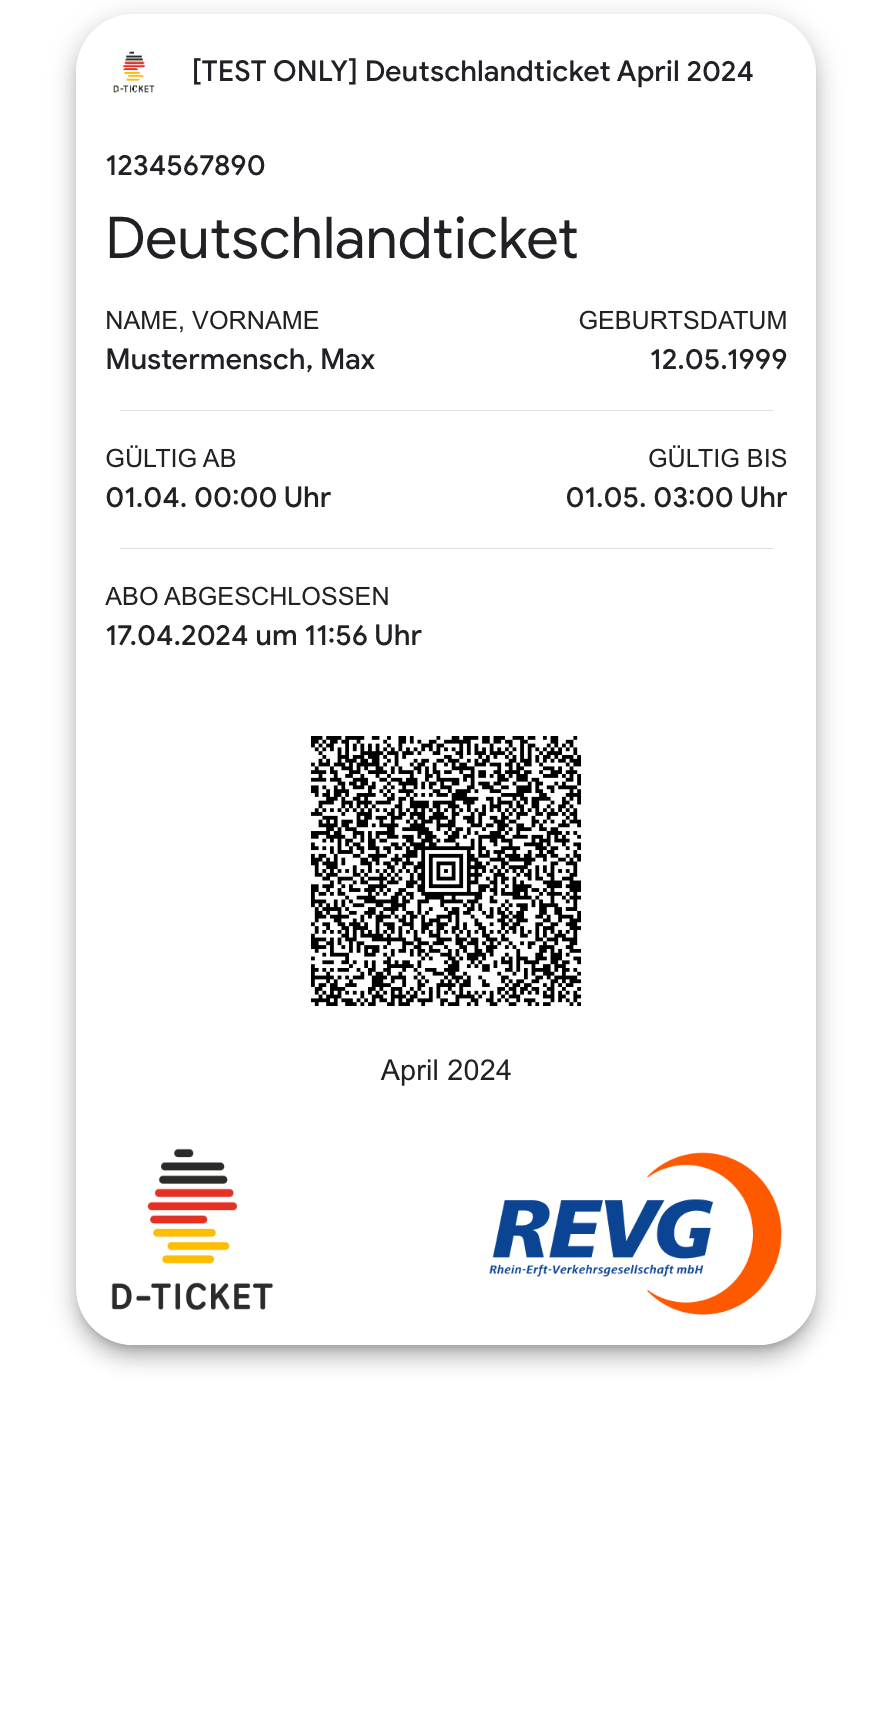
The Mobility Wallet will change slighty and adds a Details Page when pressing on a Ticket, which will show a set of buttons and some information. With these buttons the user can view the ticket inside the Mobility Wallet App or Add it to Apple Wallet. Also he can open the subscription Manage Page (if the ticket was bought with Fastlink), share the ticket or can remove the ticket from the App.
Google Wallet
Our ticketing system also offers seamless integration with Google Wallet, allowing users to store their tickets directly on their Android devices. This documentation outlines the process of creating an Google Wallet pass using our API.
Steps to Create and Integrate an Google Wallet Pass with our API:
NOTE: The next chapters will explain the usage of the ticketing and Google Wallet pass endpoints in an abstract way. Please check out the Ticketing API documentation for a detailed api description.
Step 1: Order a Product
Start by placing an order for your desired product via our ticketing API (ensure you're using API V6 or higher). Once the order is complete, you'll receive a coupon.
POST /v6/ticketing/orders.json
  -H 'Authorization: Bearer {your_api_key_here}'
  -H 'Content-Type: application/json; charset=utf-8'
{
  "product_ids": ["mobilitybox-product-uuid"]
}
Step 2: Activate Coupon and Obtain Ticket ID
Activate the coupon you received to obtain the corresponding ticket ID. The ticket ID will be required to generate the Apple Wallet pass.
POST /v6/ticketing/coupons/{coupon_id}/activate.json
  -H 'Content-Type: application/json; charset=utf-8'
{
  "identification_medium": {
    "photo_id_lite": {
      "first_name": "Max",
      "last_name": "Mustermensch",
      "birth_date": "1999-05-12"
    }
  }
}
Step 3: Create and receive Google Wallet Pass
After receiving the ticket ID you have two options to create, receive and integrate the Google Wallet Pass.
Option 1:
Create Google Wallet pass using the following API:
GET /v6/ticketing/passes/google_wallet/{ticket_id}
Upon successful invocation of the API endpoint, you will get redirected to google to add the generated pass to your Google Wallet.
Option 2:
Create Google Wallet pass using the following API:
GET /v6/ticketing/passes/google_wallet/{ticket_id}.json
Upon successful invocation of the API endpoint, you will receive the link to your Google Wallet Pass. This can be used in the Add to Google Wallet button.
NOTE: It is not allowed to add a "Add to Google Wallet" Button into iOS Apps
NOTE: Please check out the Add to Google Wallet Guidelines to fullfill their requirements of integration this feature
Mobility Wallet
The Mobility Wallet will change slighty and adds a Details Page when pressing on a Ticket, which will show a set of buttons and some information. With these buttons the user can view the ticket inside the Mobility Wallet App or Add it to Google Wallet. Also he can open the subscription Manage Page (if the ticket was bought with Fastlink), share the ticket or can remove the ticket from the App.